CTC 3D Printer Review

DoranAerospace Homepage

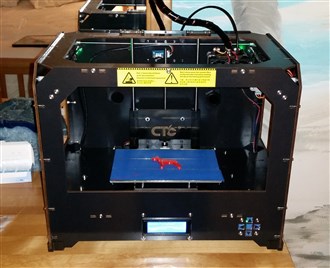
     Late last year while working on my senior project at Penn State, I was introduced to the world of 3D printing. My senior project was to design a 3D printer capable of printing in both a polymer and a metal. While the project itself was semi-successful, I really caught the 3D printing bug. I decided to purchase one for myself almost immediately after building the one for Penn State. There were tons of options out there, and I was also highly considering building my own Delta style 3D printer. However, after researching the market for some time, and with a limited budget in mind, I found the CTC 3D Printer for sale on eBay for around $500 with free shipping. I realized that at this price point I couldn't even but all the parts to build my own, let alone the frustration of designing a machine from scratch. I was however pretty concerned about the quality of the machine, so I went to YouTube and the 3D printing forums to find all the information I could about them. Most of what I found surprised me, with many owners saying it was just as good as the much more steeply priced Makerbot Replicator, after which the CTC is based, or even the Flashforge, which is another Makerbot Clone. After a couple days of research, I decided to purchase the machine.

Upon arrival I was very surprised to see how well it was packaged, and not the slightest bit of damage occurred during shipping. I soon had the machine unboxed, and set up on my desk where I plugged it in, and ran the calibration procedure which the machine walks you through and loaded filament, which was again all machine prompted. I also noticed a few of the small bolts/nuts holding the frame together had rattled a b it loose during shipping, so I went around the machine and tightened them all up. I also had to attach the extruder head which was quite simple. Then I loaded in the included SD card which had some test prints on it and gave it the go to print. Shockingly, it was up and printing within 45 minutes of opening the box. I was pretty thrilled with the simplicity of it and how easy it was to set up. The first print also came out shockingly good, with no issues throughout the print.

Soon after, I printed a calibration cube and realized the Y-Axis was a bit off. I also printed a cylinder which further indicated the Y-Axis was off since the cylinder measured a smaller outer diameter on the Y-Axis sides. After playing around with it for a couple hours, and thinking I bought a piece of junk, I realized that the Y-Axis belt needed a bit more tension on it, and after tightening it up, the printer was then quite accurate on all axis.

CTC 3D Printer Setup

     The printer came with all the necessary accessories for getting started in 3D printing. This included spool holders, a roll of red PLA filament, and a bunch of spare hardware which was nice to see included since M3 hardware isn't very easy to find in my area.  Below you can see pictures of some of the included accessories, as well as how the printer was packaged within its larger outer box.

CTC 3D Printer Setup                         Fins cut out 

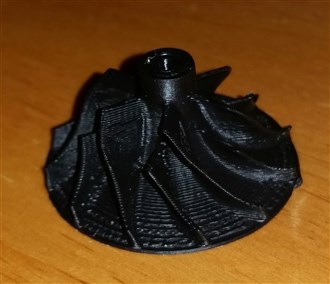
    After doing the test prints and fiddling with the machine for a while, I installed the software on my computer. Setup was pretty easy, and there were many good tutorials on YouTube which helped with deciding which software was best for my printer. I ended up going with both the Makerware and also ReplicatorG.  I find both work better for different prints. For instance when printing a small turbine, the Makerware definitely did the better job, however I do not like the interface nearly as much, and there are many less options so in many other prints I will use ReplicatorG. Makerware does a much better job of printing rafts however, when part warping or lifting is a concern.
     

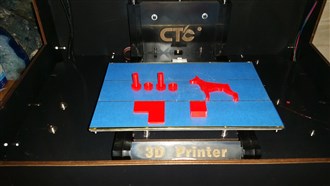
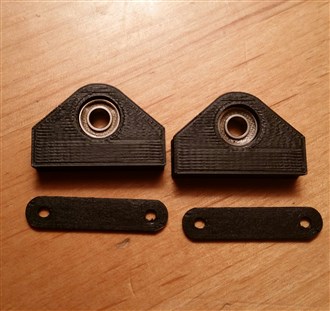
Turbine Printed on the CTC                         Some of the first parts made on the CTC                          Pillow Block Bearings Made With The CTC

     Above you can see a few of the things I have printed on the CTC 3D printer. As you can see, the finish is not perfect, but with any type of FDM printer you will get such a surface texture. Overall I have been very happy with the printer, it can create extremely intricate parts in a very reasonable amount of time with a good surface finish.

    I also upgraded the firmware to Sailfish, and that has even further improved the printer, allowing for changing the bed temperature, extruder temperatures, and movement/extrusion rates on the fly, which is extremely useful. To download Sailfish, check out the Thingiverse page which has the download information and a great tutorial on how to upload the firmware. 

    All in all, I believe that for $500 this machine is every bit as good as the equivalent Makerbot, which costs four times the price. It is well worth every penny I spent on it and has been useful in creating replacement parts for my tools in the garage. With very minor upgrades, it can become a very capable machine. I also have a Thingiverse page, where I designed a LED fixture mount for the printer, so that you can light up the workspace and keep a better eye on your prints. Check it out below and see my Thingiverse page here.

Light Setup on CTC 3D Printer                            Light Fixture for the CTC 3D Printer

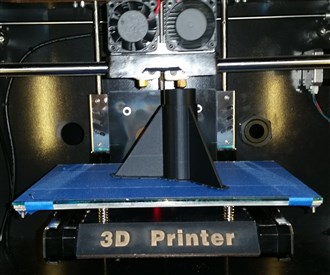
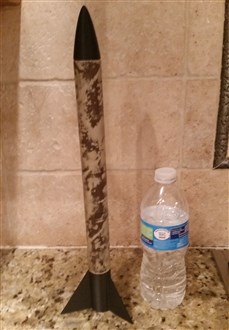
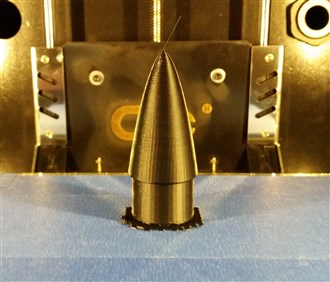
Recently, I also built a model rocket using the CTC printer, using the stout cardboard tube from the center of an Reynolds Wrap aluminum foil box as the body, printing the nosecone and aft section of the rocket was a breeze! Check it out:

Rocket Fins Printed on 3D Printer                         Rocket Made 3D Printer                          Rocket Nose Cone Printed on 3D Printer

    If you found this page useful and are considering purchasing a CTC 3D Printer, please consider helping to fund my projects by purchasing it through Amazon.


DoranAerospace Home